酒石酸-硫酸阳极氧化铝合金中酒石酸-苏氟酸阳极氧化(TSA)的控制检测方案(白光干涉测厚)
检测样品 电子元器件产品
检测项目 酒石酸-苏氟酸阳极氧化(TSA)的控制
方案详情文
智能文字提取功能测试中
Film Metrology SpecialistsFor further information please contact us at info@thetametrisis.com or sales@thetametrisis.comThetaMetrisis @ 2012, www.thetametrisis.com ThetaMetrisis APPLICATION NOTE #008 Control of Tartaric Sufluric Acid Anodizing (TSA)- Anodiccoating characterization by WLRS Goal: Thickness measurement of anodic coating on Al alloys from Tartaric Sulfuric Acid anodization Means & Methods: Aluminum-2024 alloys were prepared in an all Chrome-free process and were anodizedfollowing standard industrial tartaric sulfuric acid anodization and for various processing times. The anodiccoating thickness and the refractive index were measured with an FR-Basic tool operating in the 400-800nmspectral range following the standard measurement procedure (reflectance spectrum from the sample,reference reflectance spectrum from Al mirror, dark spectrum). The fitting of the absolute reflectancespectrum with the WLRS algorithm implemented in the FR-Monitor software provides the refractive index andthe thickness of the alumina layer. The measured coating thickness values were compared with values from astylus profilometer (Ambios XP-2). Fig. 1: Experimental and fitting reflectancespectra. Screen shot from the FR-Monitor. Results: In Fig. 1 the experimental reflectance data (blackcurve) and the results from fitting (red) with WLRS algorithmfrom one sample are shown. In all cases reasonable agreementof the extrema positions in the experimental and fitted curvesare demonstrated and the coating thickness is calculated withhigh accuracy. The deviation in the amplitude of the extremabetween the two curves in certain cases could be attributed toincreased surface roughness or coating thickness variation in theprobed area. The refractive index as calculated by FR-Monitor isin the 1.45-1.55 range. In Table 1 the coating thicknesses ascalculated by WLRS are compared with the profilometry values. Sample WLRS Stylus Profilometer Thickness Standarddeviation Thickness Standarddeviation S_1 1.5 0.2 1.3 0.3 S_2 2.0 0.1 2.0 0.2 S_3 2.6 0.1 2.5 0.1 S 4 3.0 0.1 2.9 0.1 Table 1: Anodic coating thickness from WLRS and profilometer.STD values have been extracted from 5 measurements (allvalues in Table are in micrometers-um) Fig. 2: Thickness (nm) mapping along a tartaric sulfuricacid anodized Aluminum 2024 allov. In Fig. 2 a thickness mapping (4cmX4cm) is illustrated. The thickness (scale bar in nm) varies from 2000 nm toover 2350 nm. A clear thickness variation, seen at 20000 um (2 cm) in the Y axis is observed (intentionallyfabricated during anodization) that could not be detected using standard thickness measurement techniques. Conclusions: WLRS in an accurate and powerful methodology for the non-contact, non-destructive, fastmeasurement of Anodic coating thickness measurement on Al alloys from tartaric sulfuric acid anodization, orrelevant anodizing methodologies. 酒石酸-苏氟酸阳极氧化(TSA)的控制-用WLRS表征阳极涂层目的:测定酒石酸-硫酸阳极氧化铝合金阳极镀层的厚度方法:采用全铬工艺制备铝-2024合金,并按照标准工业酒石酸-硫酸阳极氧化和不同的工艺时间进行阳极氧化。按照标准测量程序(样品的反射光谱、铝镜的参考反射光谱、暗光谱),使用在400-800nm光谱范围内工作的FR基本工具测量阳极涂层厚度和折射率。利用在FR监控软件中实现的WLRS算法对反射光谱进行拟合,提供了氧化铝层的折射率和厚度。将测量的涂层厚度值与触针轮廓仪(Ambios XP-2)的值进行比较。结果:显示了一个样本的实验反射率数据(黑色曲线)和用WLRS算法拟合(红色)的结果。在所有情况下,证明了实验曲线和拟合曲线中极值位置的合理一致性,并以高精度计算了涂层厚度。在某些情况下,两条曲线之间极端振幅的偏差可归因于探测区域的表面粗糙度增加或涂层厚度变化。由fr监测仪计算的折射率在1.45-1.55范围内。在表1中,通过WLRS计算的涂层厚度与轮廓测量值进行比较。显示了厚度映射(4cmx4cm)。厚度(刻度条单位:nm)在2000 nm到2350 nm之间变化。在Y轴20000 um(2 cm)处观察到明显的厚度变化(在阳极氧化过程中有意制造),无法使用标准厚度测量技术检测到。 结论:WLRS在一个准确而有力的方法学中用于铝合金阳极镀层厚度的非接触、无损、快速测量,或相关的阳极氧化方法。FR的工具基于白光反射光谱(Reports) 。准确同步的厚度测量及薄膜的折射率-一个广泛的多样化的应用范围广泛的光电特性的工具和整体解决方案,如:半导体、有机电子、聚合物、涂料和涂料、光伏、生物传感、化学传感...
关闭-
1/1

产品配置单
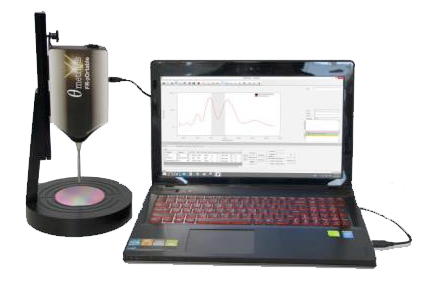
迈可诺技术有限公司为您提供《酒石酸-硫酸阳极氧化铝合金中酒石酸-苏氟酸阳极氧化(TSA)的控制检测方案(白光干涉测厚)》,该方案主要用于电子元器件产品中酒石酸-苏氟酸阳极氧化(TSA)的控制检测,参考标准《暂无》,《酒石酸-硫酸阳极氧化铝合金中酒石酸-苏氟酸阳极氧化(TSA)的控制检测方案(白光干涉测厚)》用到的仪器有便携式光学膜厚仪、进口纳米狭缝涂布机、CNI v3.0 PV紧凑型纳米压印。
我要纠错
相关方案



 咨询
咨询