方案详情文
智能文字提取功能测试中
pH ofDrinking WaterpH ofDrinking Water pH ofDrinking Water Star SeriesMethod Note M-1000-E 03/05 RevB pH Introduction ·Drinking Water Measurement of pH is one of the most important and frequently used tests in water chemistry. ROSS°Sure-Flow°electrodes offer stable, fast results regardless of sample temperature or composition. · pH Electrode Recommended Equipment Catalog# 1.3 Star benchtop pH meter 1112000 2. ROSS°Sure-Flow°combination electrode 8172BNWP 2. pH 7.00 buffer (color coded yellow) 910107 3. ATC probe 927005MD 3. pH 10.01 buffer (color coded blue) 910110 4. Benchtop electrode stand 1110001 5. Beakers (50 mL) 6. Graduated cylinders (50 mL) 4. ROSS° reference filling solution 810007 5. pH Storage Solution 910001 6. Deionized water Calibration Standard Preparation 1. Ensure that all buffers are at the same temperature. If samples are at varying temperatures, temperaturecompensation is recommended. 2.Select two buffers which bracket the expected sample pH.The first should be near the electrode isopotential point (pH7) and the second near the expected sample pH. Sample Preparation 1.Collect samples of drinking water according the Sample Collection Procedure approved by EPA. 2 Using a graduated cylinder, measure about 40 mL of the sample into a 50 mL beaker and cover theS11 11ndbeaker with a watch glass. 3. Repeat this procedure for additional measurements.S. Results Five aliquots of drinking water collected from a faucet were measured. Drinking Water pH www.thermo.com Environmental InstrumentsWater Analysis Instruments166 Cummings CenterBeverly, MA 01915 USAM-1000-E 03/05 RevE248060-001 Toll Free:1-800-225-1480Tel:1-978-232-6000Dom. Fax:1-978-232-6015Intl Fax: 978-232-6031www.thermo.com/waterO 2005 Thermo Electron Corporation RegisteredISO9001:2000 Sample # 1: 7.27 Sample # 2: 7.26 Sample#3: 7.26 Sample # 4: 7.33 Sample #5: 7.32 All rights reserved Mean: 7.29 Standard Deviation: 0.0340.47 %CV: Electrode Storage For brief storage periods between sample measurements, soak electrode in pH Electrode Storage Solution. IfStorage Solution is not available, use about 200 mL of pH 7 buffer to which about 1 gm. KC has been added, as a temporary substitute. For longer storage periods, the reference chamber should be filled and the filling hole covered. Cover the sensingelement and reference junction with its protective cap containing a few drops of pH storage solution. The ATCprobe has no special storage requirements. Equipment Setup Electrode Setup -ROSS° Sure-Flow° Remove the protective shipping cap from sensing element and save for storage., Clean any salt deposits from exterior by rinsing with deionized water. 3. Uncover filling hole by removing plastic sleeve, and add ROSS" Internal Filling Solution to electrode. Tomaintain an adequate flow rate, the level of filling solution must cover the coil and be at least one inchabove the sample level when immersed. 4. Thoroughly wet the junction by pressing down on the electrode cap and allowing some of the ROSSfilling solution to flow out of the electrode through the junction. Replenish lost filling solution. 5.Shake down the electrode to remove air bubbles. 6.Soak electrode in pH Electrode Storage Solution for one hour. 7. Connect the electrode to the meter. 8 Connect the temperature probe to the meter. Meter Setup-3 Star For initial meter setup, follow the steps on the Reference Panel that is attached to the meter itself. The QuickStart Guide included with each meter also contains a layout of the meter keypad for reference. The words inall capital letters such as POWER indicate a key on the meter, and words in quotations such as“Unitindicateinformation on the meter display. 1.Connect the electrode to the meter. .22. Connect the ATC probe to the meter. .33. Press the POWER key on the meter to turn the meter on. 4. Note that the arrow on the left of the screen indicates the active line. If the top line is not active, press theLINE SELECTION key to change the selected line to the top line. Then press the UP or DOWN arrowkeys to change the measurement mode of the top line to pH. 5. Press the SETUP key to enter pH setup. Press the LINE SELECTION key to select the middle line. Pressthe UP or DOWN arrow keys to select “rES”, which is resolution. 6 Press the LINE SELECTION key to select the bottom line. Press the UP or DOWN arrow keys to select“0.001”for"rES" which is an abbreviation for resolution or number of significant digits. Press the LINESELECTION key to accept value. 7.Press the LINE SELECTION key to select the middle line, and press sthe UP or DOWN aelect “bUF”which isrrow key to pH buffer. 8 Press the LINE SELECTION key to select the bottom line, and press the UP or DOWN arrow key toselect“USA”which is US/Orion buffers. 9 Press the LINE SELECTION key to accept and select the pH setup menu line (top line). 10. Press the MEASURE key to return to the measurement mode. If all steps were followed correctly the meter display will show three digits in the top line and "pH" to the rightof the top line. The meter and electrode are now ready for calibration. Calibration and Analysis 1. Rinse the electrode first with deionized water and then with the first (pH 7) buffer. Place the electrode inthe beaker containing first buffer. 2 Wait for a stable display. Set the meter to the pH value of the buffer at its measured temperature. (A tableof pH values at various temperatures is supplied on the buffer bottle). 3 Rinse the electrode first with deionized water and then with the second buffer. Place the electrode in thebeaker containing second buffer. 4. Wait for a stable display. Set the meter to the pH value of the buffer at its measured temperature. 5.Rinse the electrode with deionized water and then with sample. 6 Place the electrode in the beaker with sample. 7 When the display is stable, record sample pH. ofof
关闭-
1/2
-
2/2
产品配置单
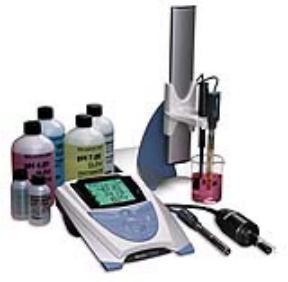
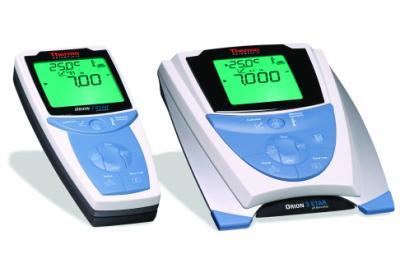
赛默飞中国实验室产品事业部为您提供《饮用水中物理指标检测方案 》,该方案主要用于饮用水中感官性状和物理指标检测,参考标准《暂无》,《饮用水中物理指标检测方案 》用到的仪器有台式pH/ORP/ISE/溶解氧/电导率测量仪、Orion 3-Star台式(便携式)pH/ORP测量仪。
我要纠错
推荐专场
水质分析仪/多参数水质分析仪
更多相关方案



 咨询
咨询
